
Hi to all, it´s my again!
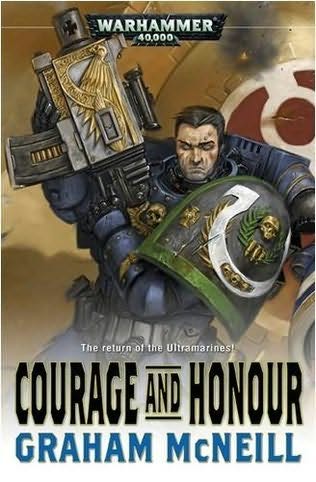
Long time ago I read a W40K novel, "Warriors of Ultramar" (Graham McNeill). The Ultramarines fight against tyranids in Tarsis Ultra planet. A lot of tyranids were defeated by the power of the Ultamarines... and I need to put it into a diorama.
In that book the battle was in a snow field, but I decided to represent it into an urban environment. An ultramarine rhino was surrounded by hordes of tyranids while an epic ultramarine captain, Uriel Ventris, defend the vehicle with his life.
Click the images/links
I couldn't wait anymore and I paint the RHINO, the main character of the diorama.
I have realized such important damages in the small tank: breaks in the lateral doors and back and, in addition, I have added it a few small details, as a kit of spades (extracted of a tank on 1:35 scale) and a series of antennas and cables that I have had to remove for the process of painted.
I have used a method of painting based in applying the paints in blows of paintbrush to give it an effect of real spoiled metal, with spots of color.
The "recipe" for the Rhino's blue is the following one (all the paints are from Vallejo, Model Color, with spanish names):
- Azul Prusia (ref 70965, Vallejo): applied to airbrush,
- Azul Oxford (ref 807, Vallejo): strong wash,
- Azul Americano (ref 903, Vallejo): first blows of paintbrush marking the first lights,
- Blanco Calcio (ref 73006, Train Color, Vallejo): mixed with the color base and the colors of the first lights,
- Turquesa (ref 966, Vallejo): blows of paintbrush to give variety to the sheet,
- Pátina Verdín (ref 832, Vallejo): blows of paintbrush to give texture to the sheet,
I added Oxide (ref 73001, Train Color, Vallejo) to made rusted areas but it isn't finished yet.
RHINO IMAGE
FIRST STEP
I want to do a very real scene, as a IIWW diorama. That's why I do a street with buildings of brick walls, not as the usual metal buildings.
I made the walls and the floor with a modelling material that is made with paper (in Spain was called DAS putty). All the bricks were handmade (about 3000!).
1st STEP IMAGE
SECOND STEP
The fachade of the building was finished, and I began with the indoor area. I used many accesories extracted of a 1:35 scale kit; you can see a lot of tools, boxes...
It was time to put some rubbles in the street, like the building was falled down and I added a little area with grass too.
2nd STEP IMAGE (1)
2nd STEP IMAGE (2)
Here you can see my own idea of the scene... (the Imperial Fist marine isn't the marine of the scene).
CONCEPT IDEA IMAGE
THIRD STEP
I began with the paint work; I tried to do a real brick scheme on the wall, and it was very difficult!
I painted indoor area and the street too, always trying to make it so real.
3rd STEP IMAGE
FOURTH STEP
In that moment I paited some details and tried rust effects, like the imperial eagle on the wall, the street lines... and I put any tools: cans, wires...
4th STEP IMAGE
FIFTH STEP
I decided to added a new building in the diorama, because it needed urbanity. I made another building as you can see... with modelling putty again.
5th STEP IMAGE (1)
Well... I paint the "new" building and I take some pictures to the terrain (with the rhino).
5th STEP IMAGE (2)
SIXTH STEP
Today I show you my latest news:
1.- I do another window glasses, because I want a realistic effect, broken by a bomb impact. I used plastic painted with the airbrush. It seems better aren´t it?
NEW WINDOW IMAGE
2.- I continue with the new building details. I do the floor and the windows with wood (it's fantasy, all you want to do becomes real!) and added new details, like the blind. I'm working a lot on this small house!
6th STEP IMAGE (1)
- Risin' up, back on the street Did my time, took my chances Went the distance, now I'm back on my feet Just a man and his will to survive...
As you can see, I painted the base of the new building and I continue detailing all the floors.
I used a Tamiya model kit to decorate the ground and I think it is a good choice.
I put a fence in the alley. I'll put a tyranid jumping it, of course!!
6th STEP IMAGE (2)
SEVENTH STEP
I'm here again!!
Last week I showed you the paint work of the "new" building. Today I painted the "old" one, the brick factory.
I repainted the original rubbles scheme and I put a lot of minidetails, like gas cans, some papers (I put the front of the Marca (spanish sport newspaper), with the FCBarcelona design on it), some bricks, boxes and many other things. I think that these details brings realism to the scene.
On this building I tried to do some trial or weathering effects, with rust and other techniques. I want to represent a very old factory destroyed by the strenght of the war. I like very much this building, because the other one was cleaner.
7th STEP IMAGE
EIGHTH STEP
I take a break, because I was very tired with this terrain work. But today I work on it and I just finished it.
I can say that the brick building was finished, all the floors. I painted them with natural colors and detailed very much, with broken glasses, ammo boxes... The street has been finished too, but I'm waiting to paint all the miniatures (about 50 tyranids) to do the final details.
I hope you like it and remember... next update will be about the miniatures!
8th STEP IMAGE
After the terrain work, I clean all the plastic miniatures. You are going to see just a "trial version" because I need to fix the composition mistakes. THAT'S NOT THE FINAL SCENE.
Next step... the paint work, I hope!
8th STEP IMAGE (2)
Now I'm working on the tyranid color scheme... and I need a real one!
The terrain has a lot of natural colors, like the red (bricks) or grey (concrete); that's why I use these colors in my tyranids. I think it's a very good urban camouflage for these aliens.
* To get that colour scheme I used these paints:
base: Black Chaos (GW) + Burnt Umber (Model Air, Vallejo),
tyranid armour: Terracota (GW) + Sand (ref. 075, Model Air, Vallejo),
shadows: Charadon Granite (GW, Foundation),
tyranid skin: Sand + Light Sand (Tamiya),
details (eyes, tongue...): Iyanden Darksun (GW Foundation), Warlord Purple (ref. 14, Game Color, Vallejo)
I'm working very hard at this moment, because the end is close... but I'm very tired, that's true.
I post you my latest update, the paint of 12 tyranids. The color scheme and the style are very personal, I know it, but I tried to adecuate it with the terrain, like a real environment camouflage.
These pictures shows you the update, but there aren't the final pose of the minis. It just an example.
I finished another 4 miniatures... and the big carnifex continues waiting me...
After a little relax, I have painted... the tyranid carnifex, the leader of the horde. I used the same color scheme in this mini that I used in the other tyranids, to get a realistic and uniform color . I added little details, like slobbers, as you can see in "Alien" films.
I show you another pictures with the minis that I painted, 3 new jumping tyranids. The end is close... hahahaha!
8th STEP IMAGE (6)
UPDATE 03/06/09
NINTH STEP
Just a little! These are my favourites words in this moment!
After 4 months of hard work, I'm here again with the "Warriors of Ultramar" diorama. It's about 95% of progress, and I'm very happy with it.
First of all I'll show you my own Uriel Ventris version, inspired by the latest novel and cover written by Graham McNeill. I tried to do an heroic marine against the tyranid hordes.
I painted it with the colors of the Ultramarine Chapter, very similar with the rhino, but not so spoiled. I'm very happy with him, because it seems like a classic god, with his short hair and furious face.
To paint the Ultramarine I used:
- base: Prusia Blue (Vallejo, ref. 70965),
- lights: Verdin (Vallejo, ref. 832) + base,
- shadows: Oxford Blue (Vallejo, ref. 807),
- washes: Charadon Granite (Foundation, GW)
- skin: Andrea Miniatures Skin Set + Warlord Purple (Game Color, Vallejo, ref. 14),
- metals: Dark Gold (Vallejo, ref. 878) + Steel (Vallejo, ref. 865),
- scratches: Charadon Granite (GW) + Sand (Model Air, Vallejo, ref. 075),
- details:
Pauldrons: Gretchin Green (Foundation, GW) + Calcium White (Train Color, Vallejo, ref. 73006),
Blood: Fire Red (Model Air, Vallejo, ref. 71084) + Black (Vallejo, ref. 71057) + Brilliant Varnish (Vallejo).

The main scene in the diorama is the battle between the ultramarine and the tyranids, but I decided to put another little scene in the top of the brick building. An Imperial Guard talking with his walkie talkie. A real human action, in the middle of the battle.

And finally, the diorama!
It needs a few details, like paint with dark tones the terrain posters' and fix the mistakes.
As I said along all the project, I tried to do the attack of the tyranids against an ultramarine rhino, and in the top of it, the battle with Uriel.
I put 2 main tyranid groups: one in the left and the other in the right, as 2 strong walls that are closing. And in the middle of them I put a few tyranids, because I needed a union between the two main forces.
The composition is like a pyramid; in the ground we find the little tyranids, and in the middle an upper areas, we find the bigger and lethal tyranids.
As you can see, the main action is the shot of Uriel to the tyranid.
I hope you like it!


0 comentarios:
Publicar un comentario